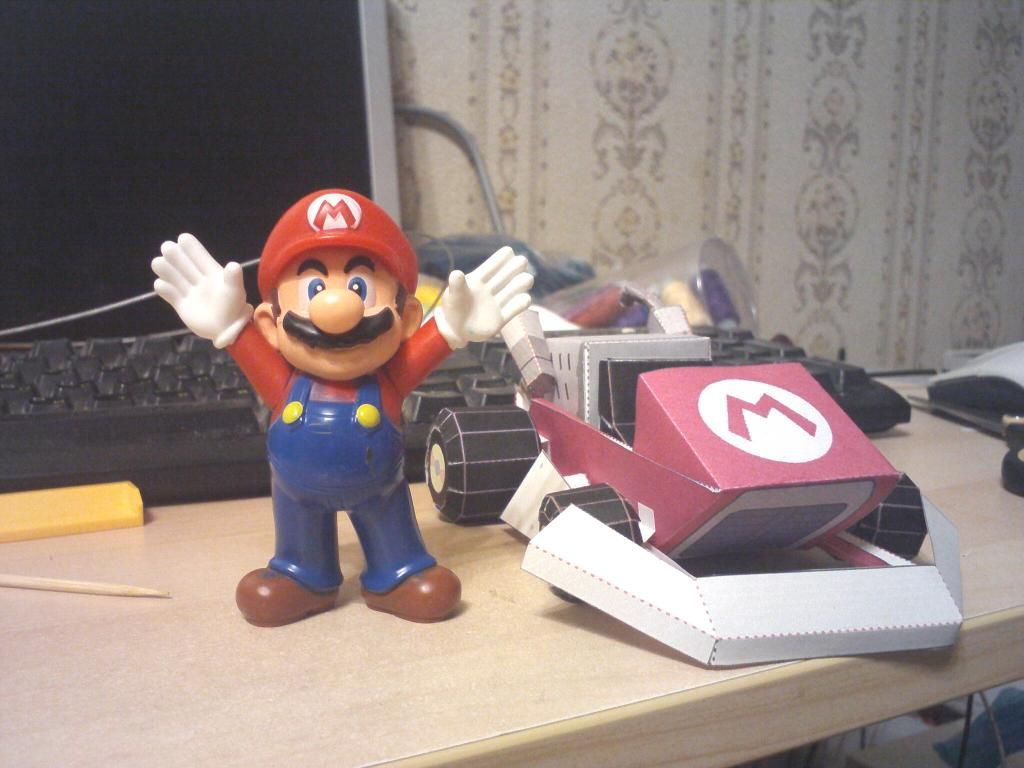
After making a papercraft Light Cycle and giving it to Luigi, it was only natural for me to look for Mario's kart papercraft to make Luigi's bragging rights more evident.
What I found was this one: http://nintendo-papercraft.com/mario-karts/
After trying to get it together, I ran into some problems ranging from obvious to ones that appear only when you try to actually make the model.
Here's how the new scheme turned out:
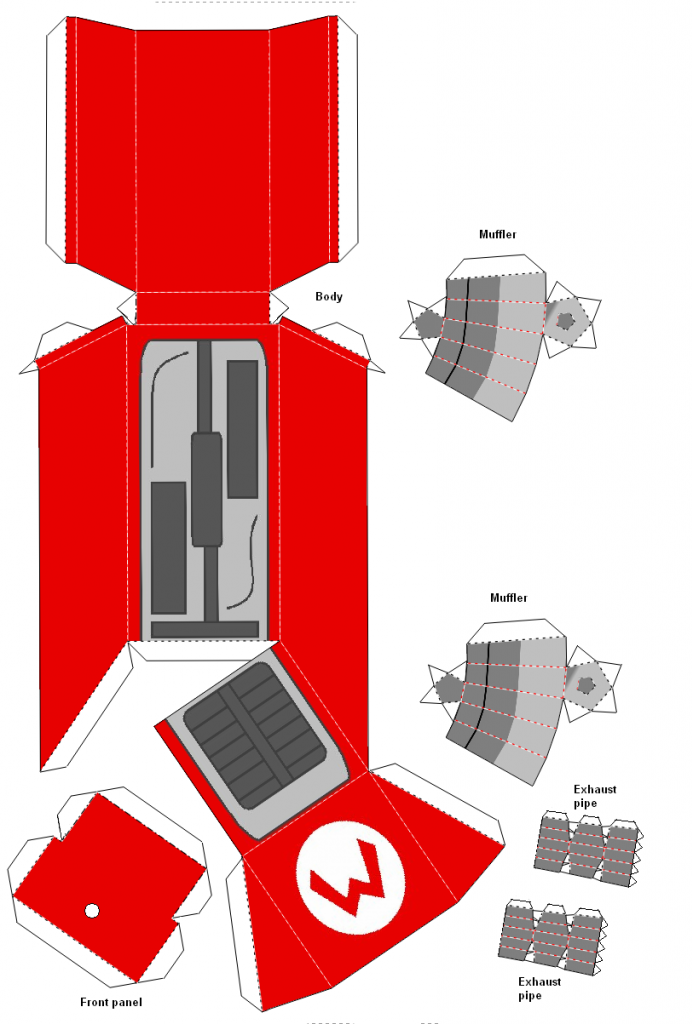
First, it was obvious that the number of pages could be reduced to at least 3, so I moved some details around.
The body was mostly okay, though there were some overlapping tabs for gluing. I removed some of those.
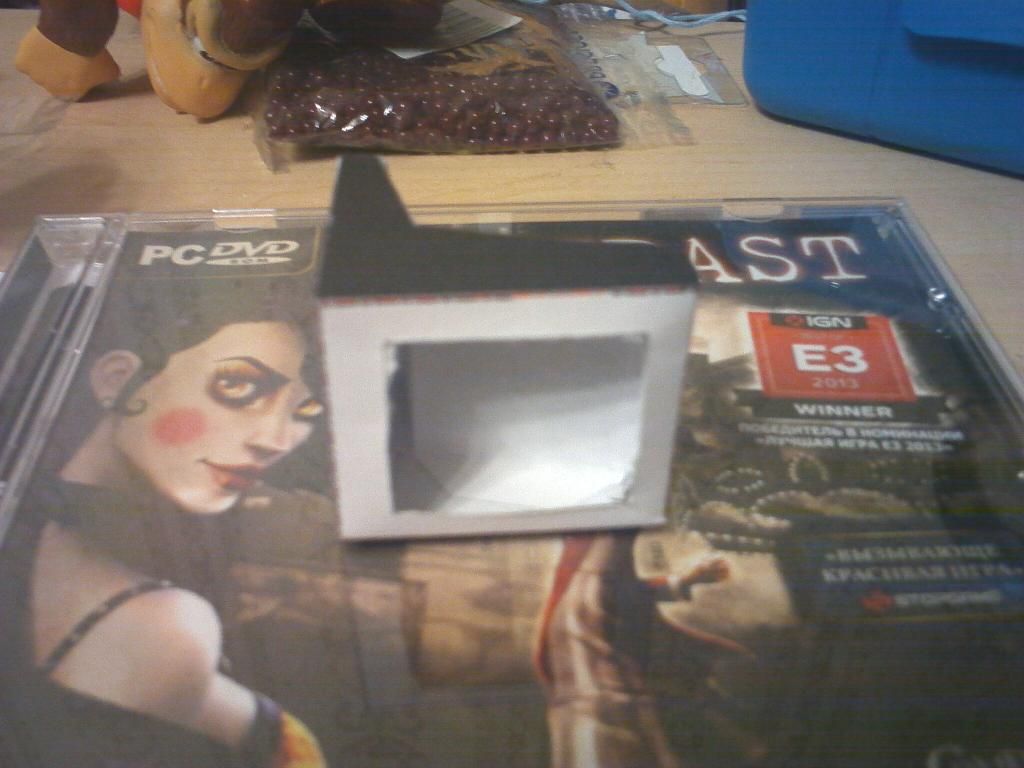
On the front panel, I made a hole where the steering wheel's axis should be positioned, so that it can be inserted more securely.
I removed the caps on the exhaust pipes, since, being pipes, they should be uncapped at least at one end - and at the other end I added flaps with the idea that the pipe will be inserted through the hole in the muffler's cover and then secured with glue from the other side. Of course, I also added corresponding holes on the mufflers (If anyone feels like this is a bad idea, you can use those pentagons just for positioning the exhaust pipes).
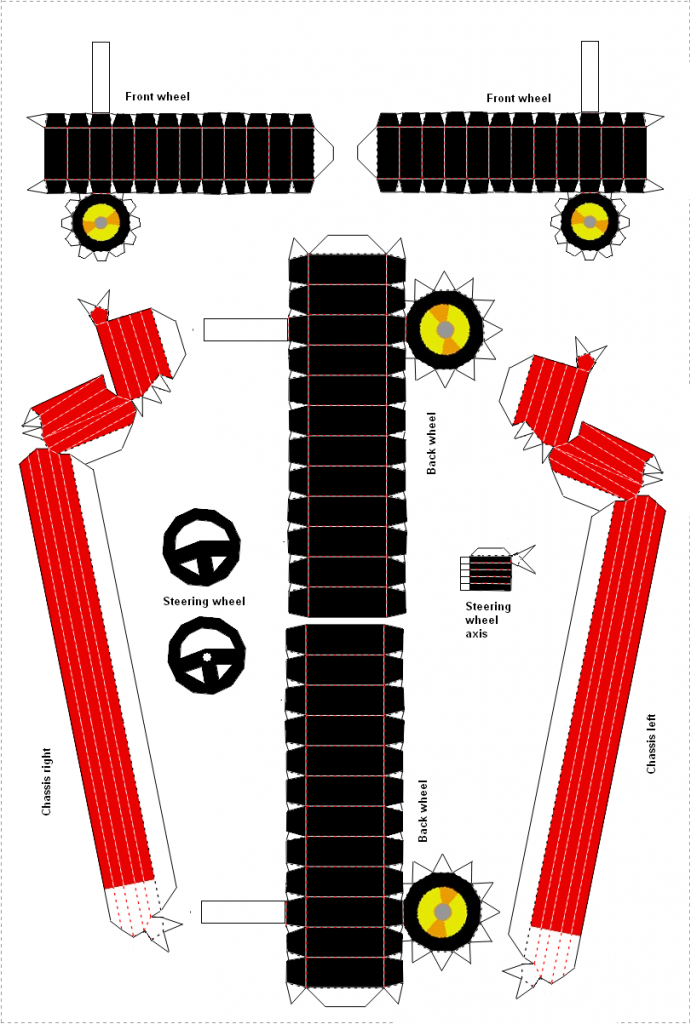
The chassis, again, had some overlapping flaps, which I removed. Also there were some flaps on the ends which were hard to fold inside, and I removed those too, as those won't be visible anyway.
It isn't marked on the model, but I recommend scoring the wide flaps on the chassis lengthwise, so it folds in two. It will help gluing it together.
I also added some flaps for installing the steering wheel, and a copy of the steering wheel, so that it won't look white from the other side.
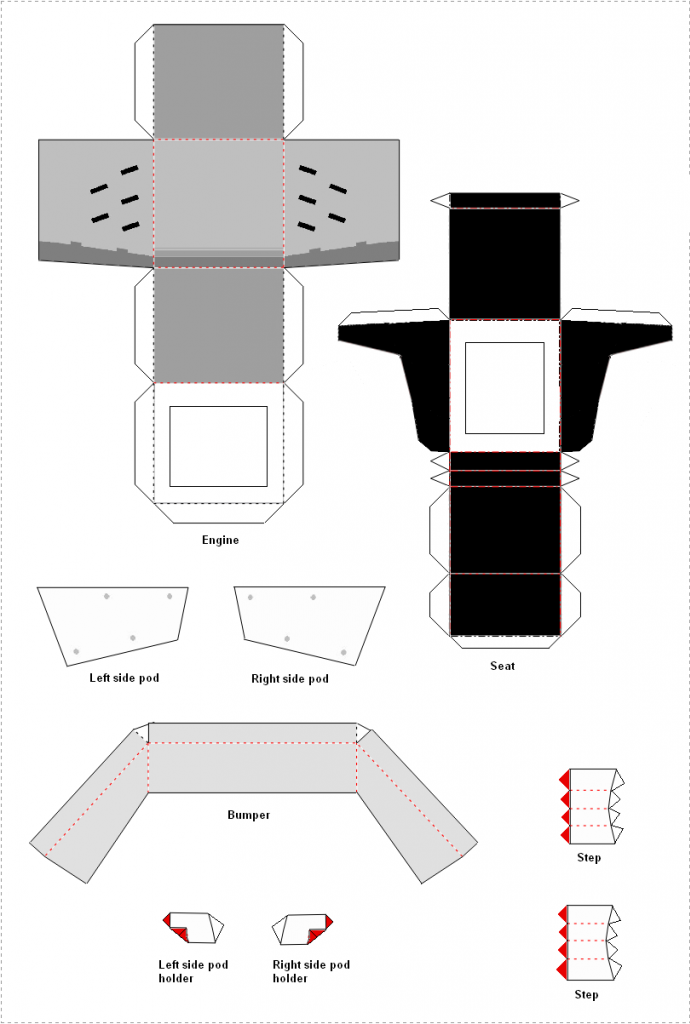
Bumper and side pods were left as they were.
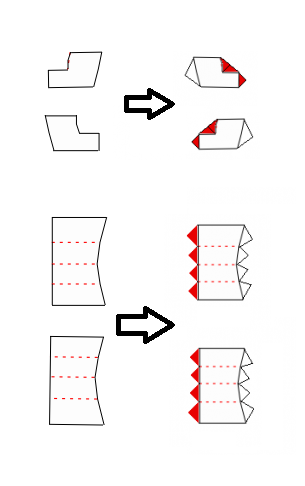
The details that hold the side pods to the body (I called them "step" and "side pod holder") were probably the most puzzling in the original scheme, since there was no obivious way to attach those either to the body or to the side pods. I added necessary flaps, and also painted them red to that there won't be white spots where they are attached (that means that whoever decides to make a recolor of this version should recolor those, too).
So, how did it work in practice (aka "Assembly guide")?
First, about materials and instruments. I've built the first kart out of album paper, which was no cardboard, but still a bit thicker. This one, I've made of simple printer, or "office" paper. Looks like my printer started to run out of yellow toner, hence the weird colors.
Though some people advice against glue stick, I've used one, though to glue in tight places I employed a thin stick with a flat end. You'd also do well to have a blunt stick to hold parts together in tight places, and also to roll some parts around (you'll see).
For cutting, scissors and an utility knife to make holes. Check that it's sharp, and put something you don't mind being cut under it when cutting!
Scoring the folds (that is, running along the folds with a blunt object) is vital for having a good model. Use a ruler for long straight lines, small ones I did by hand. I used my wife's metal knitting needle for this, make sure you ask nicely if the needle isn't yours (obviously, that's not the only option).
Now, to the model!
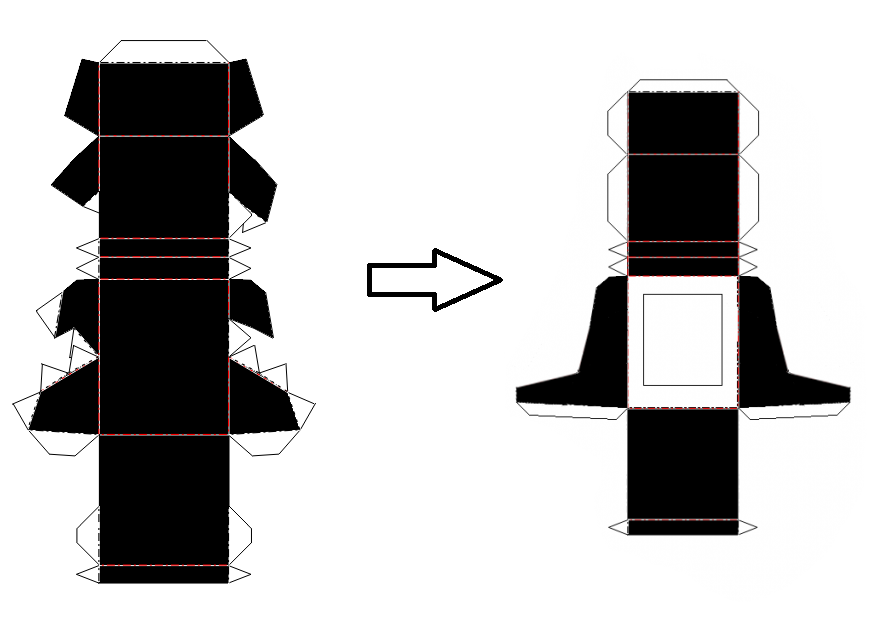
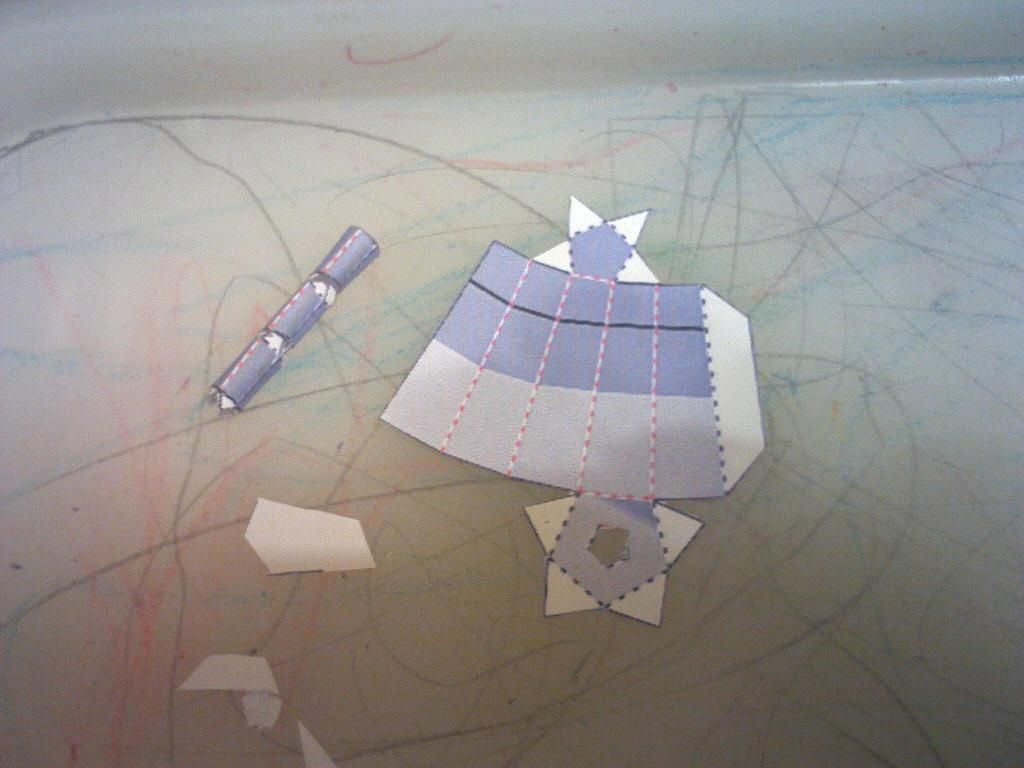
First things to assemble were the seat and the engine, though those would be glued in at the very end.
Don't worry if the holes turn out ugly. Those will be on the underside and won't be visible on the finished model.
Next, the chassis.
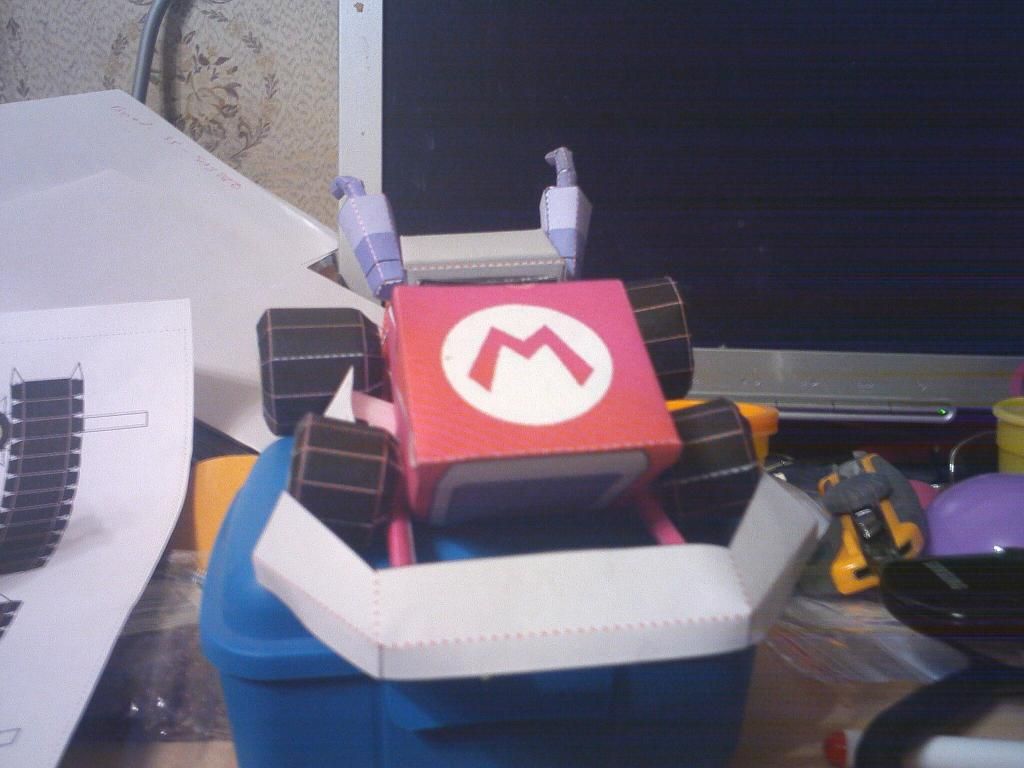
Now, when making the body, not that part of it folds inward (that's what puzzled me when I was first assembling it. The trick here is not closing the body until all side parts are glued to it, so you can apply pressure from the inside. You can glue in the front panel though. Note that I attached it wrong at first, so some photos show it in upside-down position!
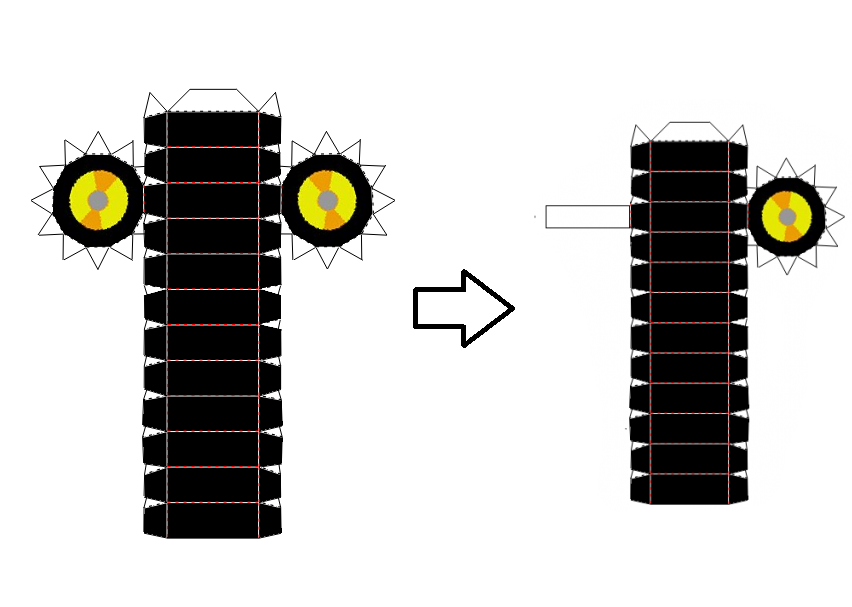
Assembling wheels is relatively simple now that you have to close only one side. The strips on the other side are actually too long, so you can cut those a bit. You glue the bottom of the wheel directly to the chassis, and the top part to the body with the strip, which you should fold a bit so that the wheel won't be too close to the body.
Here's how I positioned the step and the side pod holder:
When you're done on one side, attach the parts on the other, trying to make your build symmetrical.
Only after the chassis, the wheels and the side pods are attached, you can close the body.
When assembling the exhaust pipes, it would be a good idea to wrap those around a stick, too.
Then, glue the seat and the engine inside the body. (For some reason the engine just won't stick to the sides, so make sure to glue it good at the bottom). Cut out and put together the two sides of the steering wheel. Cut out and glue the bumper. Put the steering wheel and the bumper on the car. Glue together the back ends of the chassis.
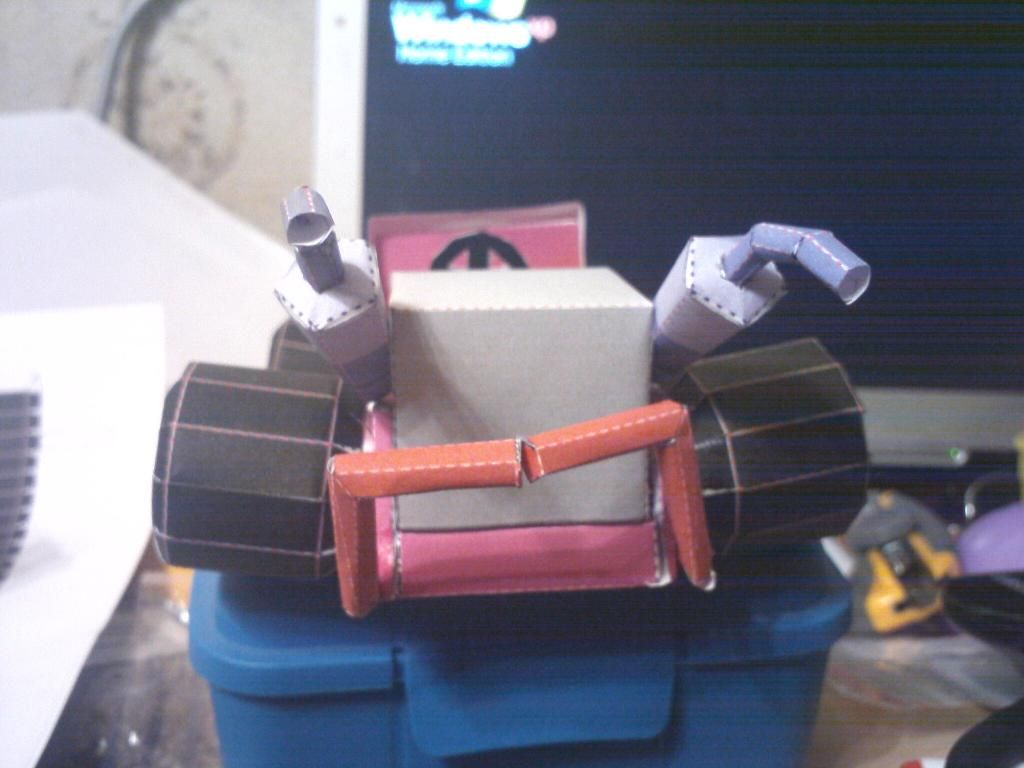
What you should get should look like this:

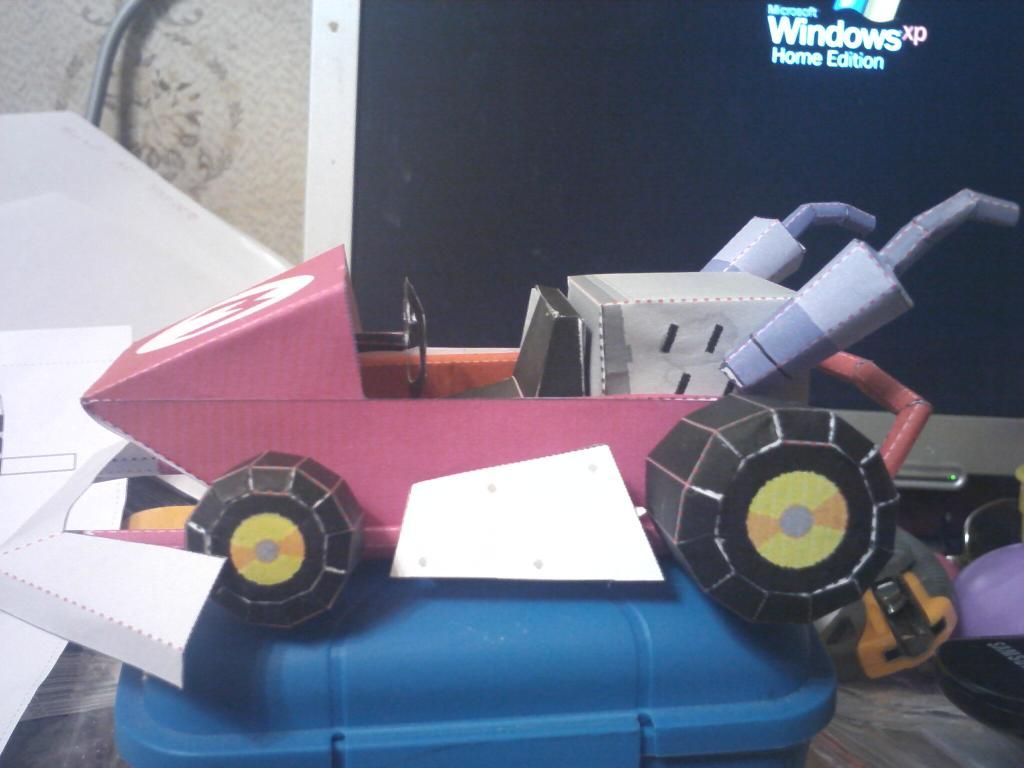
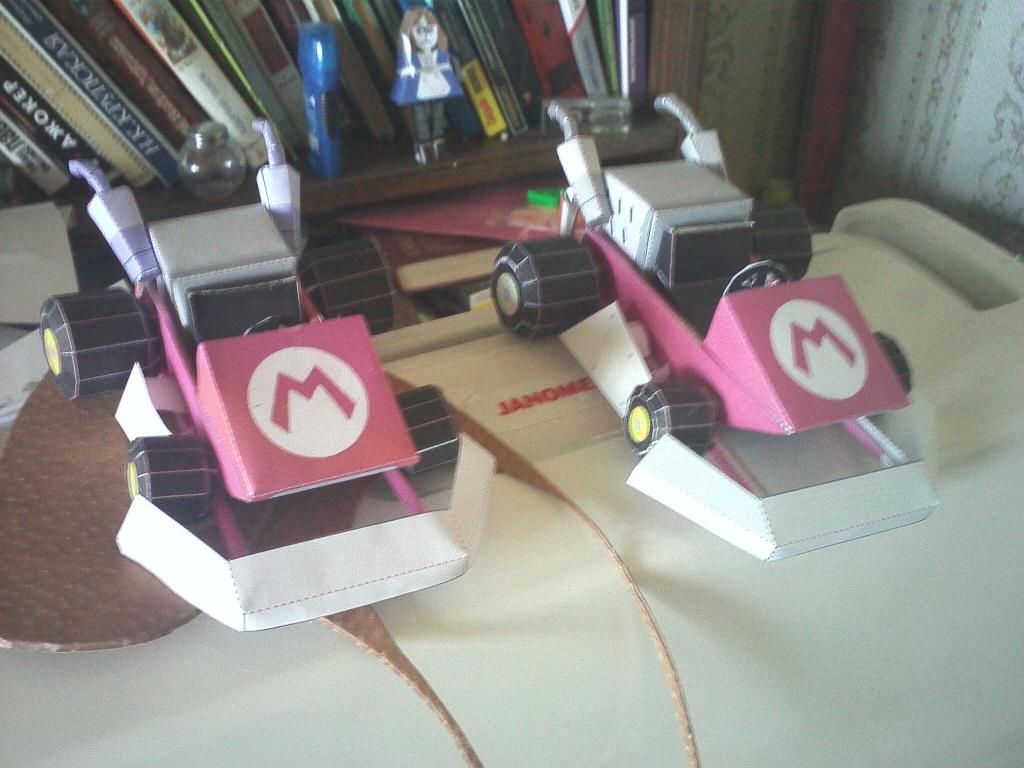
A comparison shot (new model is on the left. The chassis are definitely better, the rest is up to your judgment.
Thanks for reading, hope that helps.
What I found was this one: http://nintendo-papercraft.com/mario-karts/
After trying to get it together, I ran into some problems ranging from obvious to ones that appear only when you try to actually make the model.
Here's how the new scheme turned out:
First, it was obvious that the number of pages could be reduced to at least 3, so I moved some details around.
The body was mostly okay, though there were some overlapping tabs for gluing. I removed some of those.
On the front panel, I made a hole where the steering wheel's axis should be positioned, so that it can be inserted more securely.
I removed the caps on the exhaust pipes, since, being pipes, they should be uncapped at least at one end - and at the other end I added flaps with the idea that the pipe will be inserted through the hole in the muffler's cover and then secured with glue from the other side. Of course, I also added corresponding holes on the mufflers (If anyone feels like this is a bad idea, you can use those pentagons just for positioning the exhaust pipes).
The chassis, again, had some overlapping flaps, which I removed. Also there were some flaps on the ends which were hard to fold inside, and I removed those too, as those won't be visible anyway.
It isn't marked on the model, but I recommend scoring the wide flaps on the chassis lengthwise, so it folds in two. It will help gluing it together.
I also added some flaps for installing the steering wheel, and a copy of the steering wheel, so that it won't look white from the other side.
Bumper and side pods were left as they were.
The details that hold the side pods to the body (I called them "step" and "side pod holder") were probably the most puzzling in the original scheme, since there was no obivious way to attach those either to the body or to the side pods. I added necessary flaps, and also painted them red to that there won't be white spots where they are attached (that means that whoever decides to make a recolor of this version should recolor those, too).
So, how did it work in practice (aka "Assembly guide")?
First, about materials and instruments. I've built the first kart out of album paper, which was no cardboard, but still a bit thicker. This one, I've made of simple printer, or "office" paper. Looks like my printer started to run out of yellow toner, hence the weird colors.
Though some people advice against glue stick, I've used one, though to glue in tight places I employed a thin stick with a flat end. You'd also do well to have a blunt stick to hold parts together in tight places, and also to roll some parts around (you'll see).
For cutting, scissors and an utility knife to make holes. Check that it's sharp, and put something you don't mind being cut under it when cutting!
Scoring the folds (that is, running along the folds with a blunt object) is vital for having a good model. Use a ruler for long straight lines, small ones I did by hand. I used my wife's metal knitting needle for this, make sure you ask nicely if the needle isn't yours (obviously, that's not the only option).
Now, to the model!
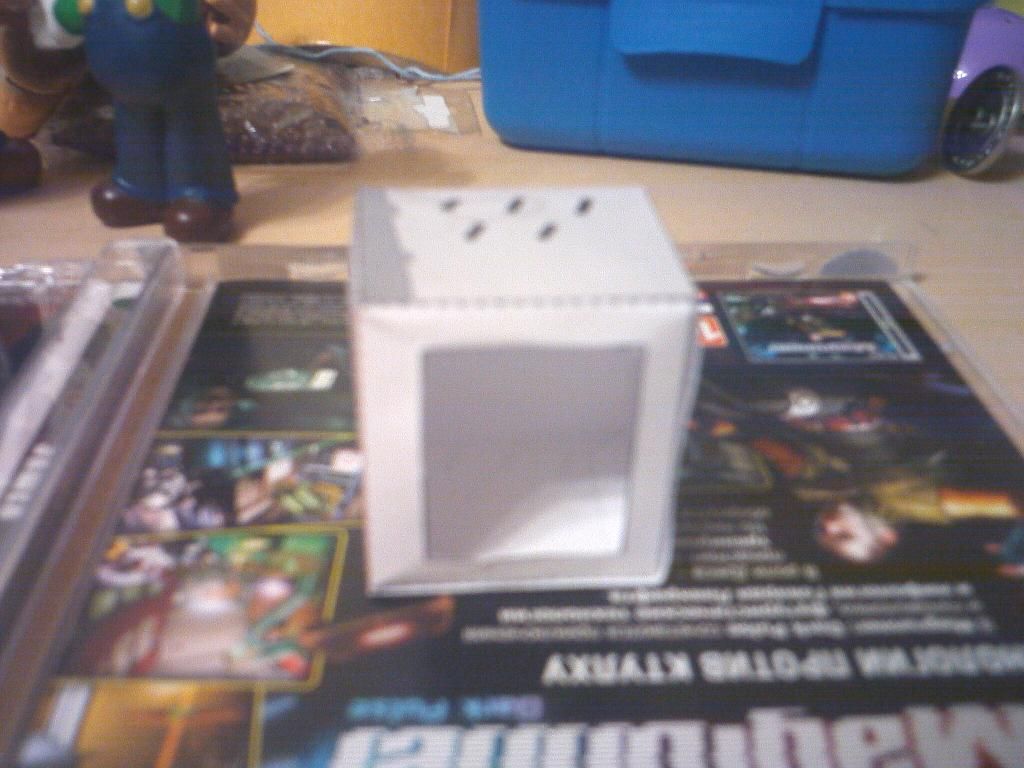
First things to assemble were the seat and the engine, though those would be glued in at the very end.
Don't worry if the holes turn out ugly. Those will be on the underside and won't be visible on the finished model.
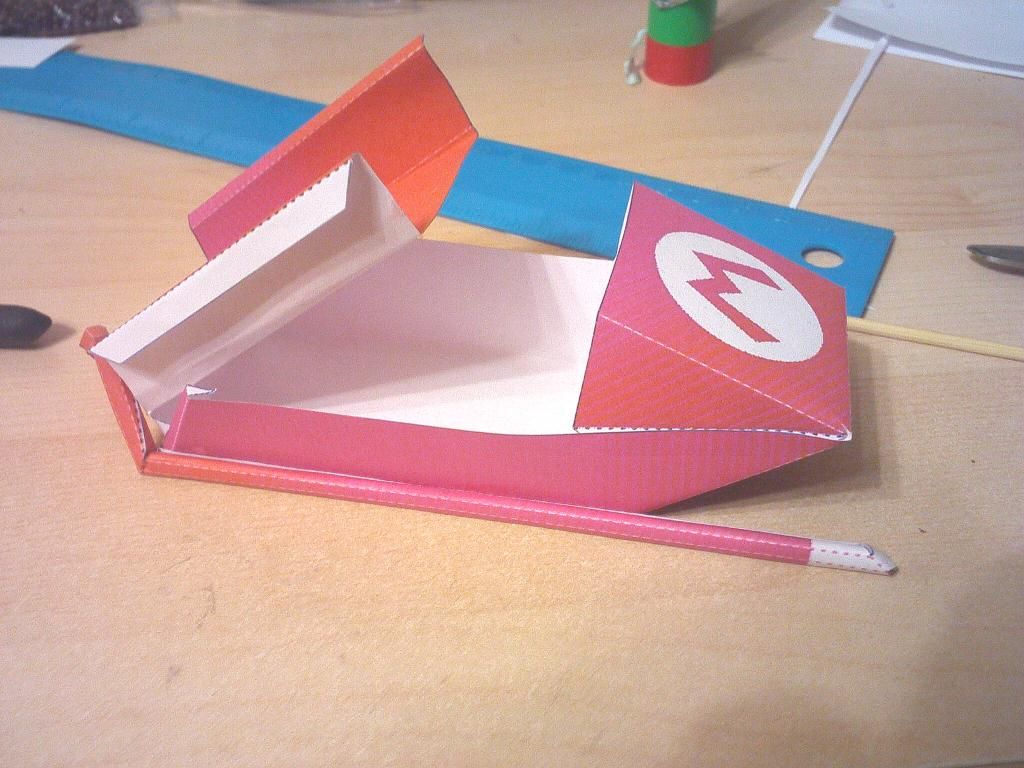
Next, the chassis.
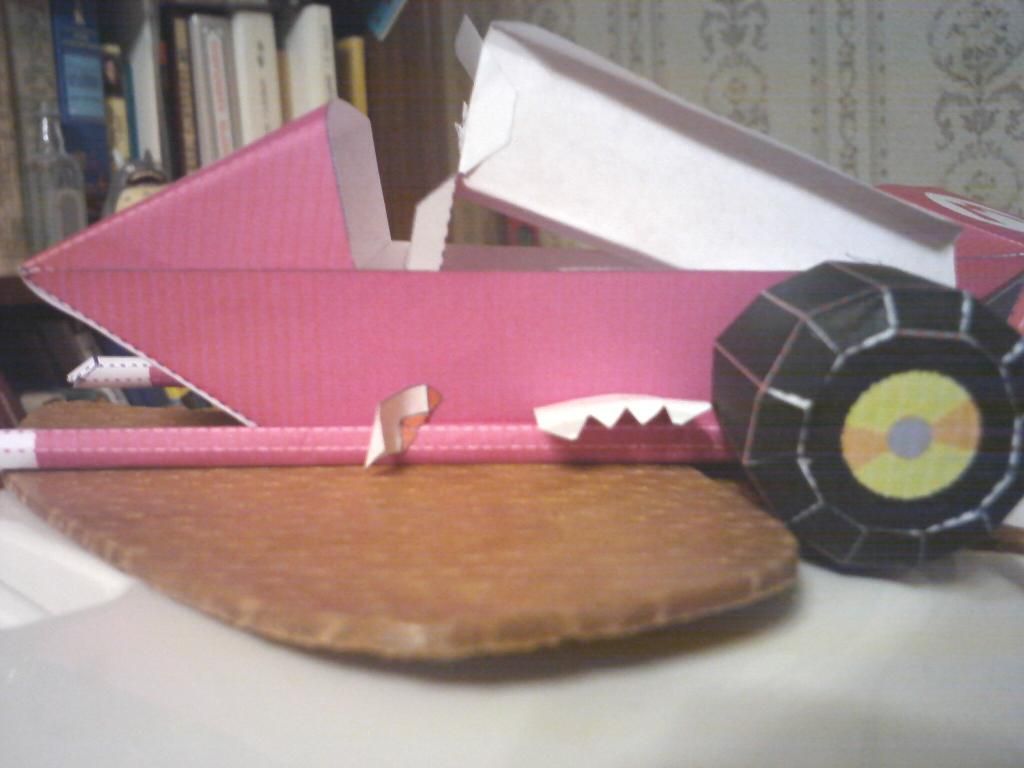
Now, when making the body, not that part of it folds inward (that's what puzzled me when I was first assembling it. The trick here is not closing the body until all side parts are glued to it, so you can apply pressure from the inside. You can glue in the front panel though. Note that I attached it wrong at first, so some photos show it in upside-down position!
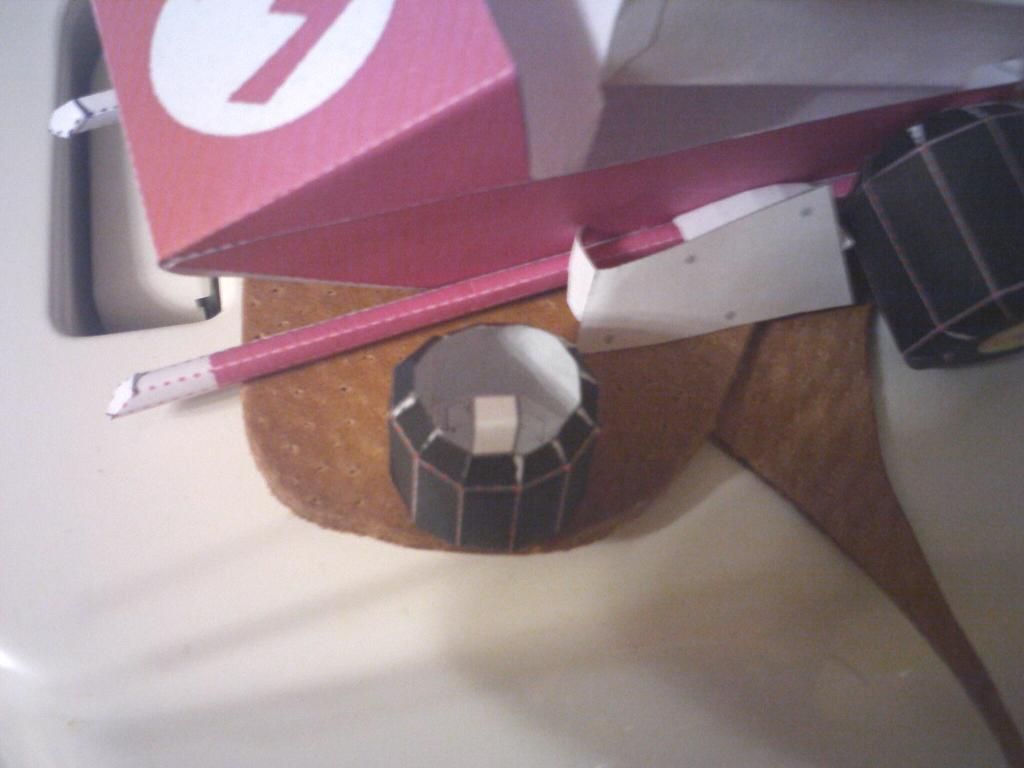
Assembling wheels is relatively simple now that you have to close only one side. The strips on the other side are actually too long, so you can cut those a bit. You glue the bottom of the wheel directly to the chassis, and the top part to the body with the strip, which you should fold a bit so that the wheel won't be too close to the body.
Here's how I positioned the step and the side pod holder:
When you're done on one side, attach the parts on the other, trying to make your build symmetrical.
Only after the chassis, the wheels and the side pods are attached, you can close the body.
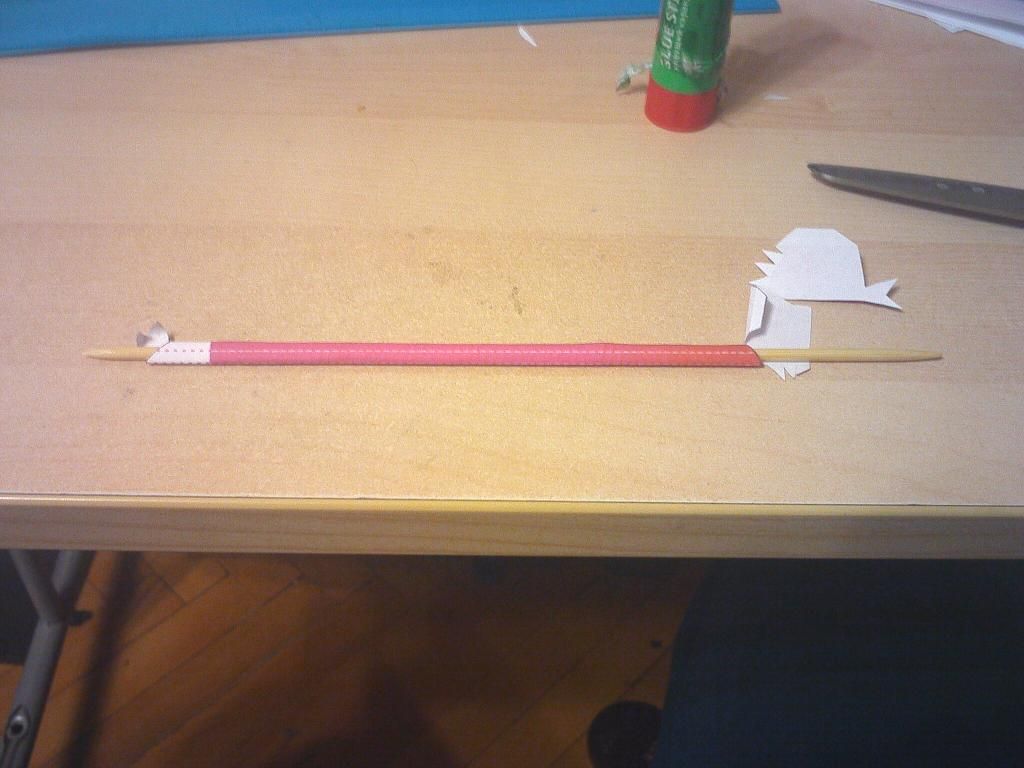
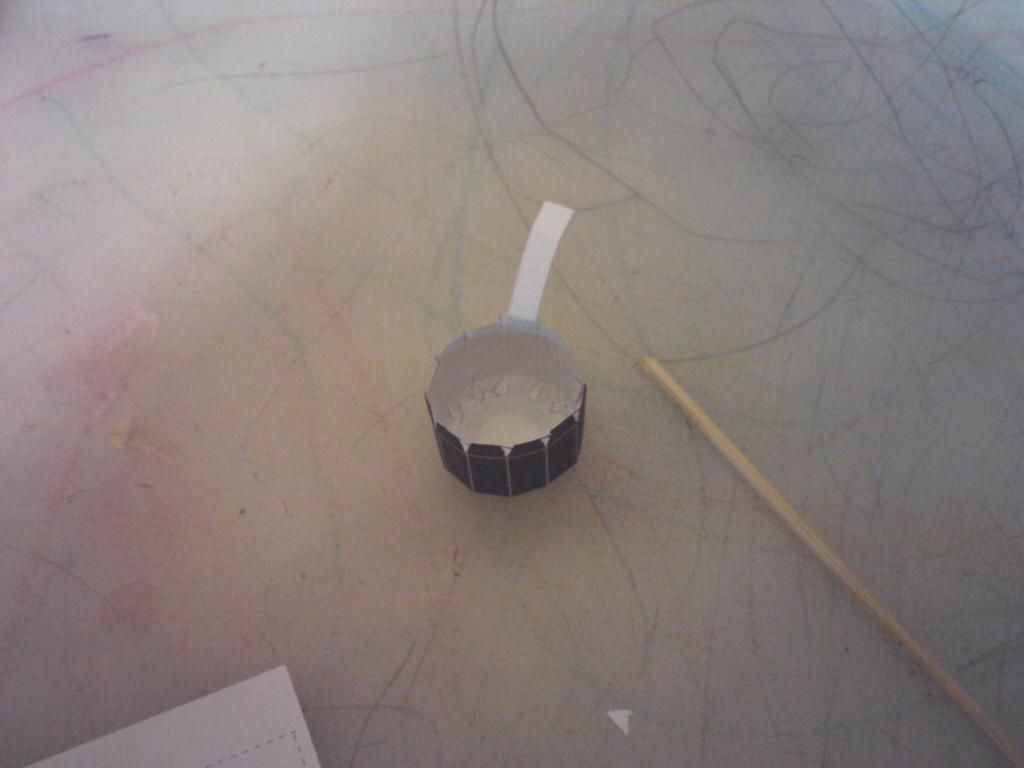
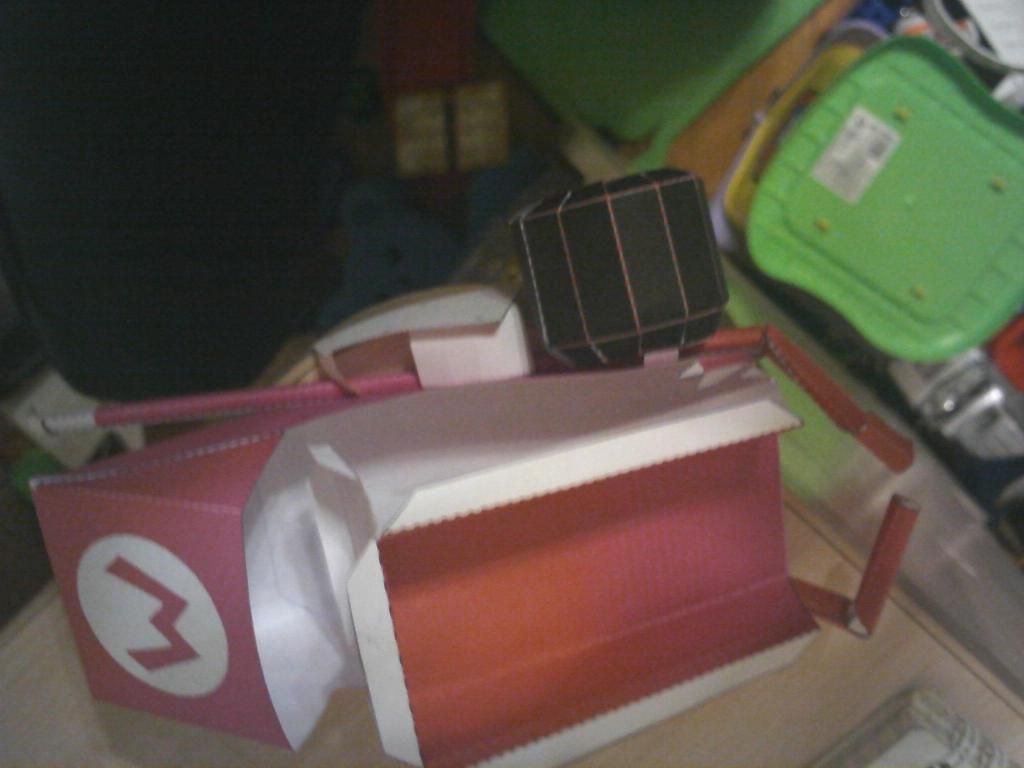
When assembling the exhaust pipes, it would be a good idea to wrap those around a stick, too.
Then, glue the seat and the engine inside the body. (For some reason the engine just won't stick to the sides, so make sure to glue it good at the bottom). Cut out and put together the two sides of the steering wheel. Cut out and glue the bumper. Put the steering wheel and the bumper on the car. Glue together the back ends of the chassis.
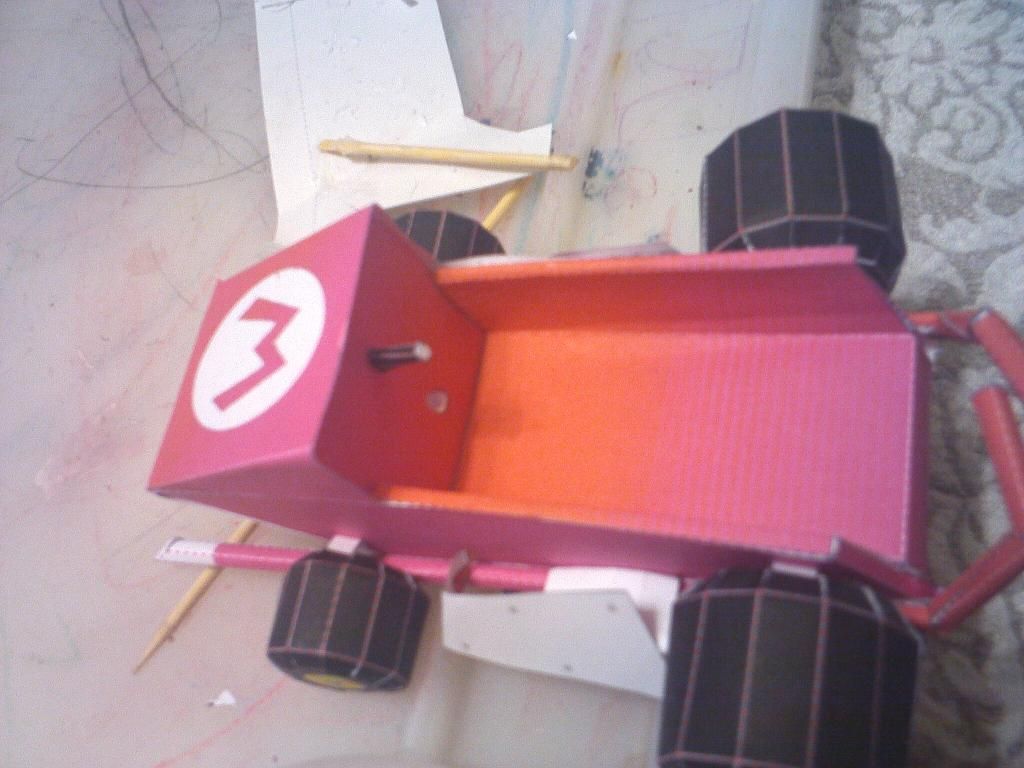
What you should get should look like this:
A comparison shot (new model is on the left. The chassis are definitely better, the rest is up to your judgment.
Thanks for reading, hope that helps.
Комментариев нет:
Отправить комментарий